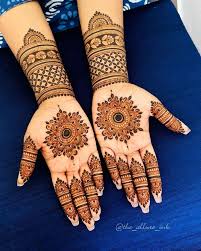
1. Start with the Central Circle:
Begin by drawing a small circle at the center of your palm. This will serve as the base for your mandala. Gradually add larger concentric circles around it, ensuring a balanced structure for your design.

2. Add Radial Patterns:
Extend radial patterns from the central circle, using symmetrical shapes like petals, leaves, or geometric forms. Make sure each element radiates evenly to maintain balance and symmetry.
3. Incorporate Intricate Details:
Fill the spaces between the shapes with delicate lines, dots, or smaller geometric patterns. These details add complexity, transforming simple shapes into a more intricate design.
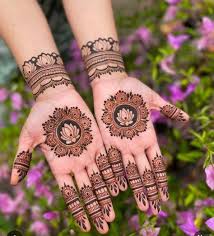
4. Work on the Edges:
As you near the outer circle, add elaborate shapes like floral motifs or peacock feathers. These contrasting elements balance the design and give it a dynamic feel.
5. Add Depth:
Go back and add small dots and thin lines inside the shapes to create depth. Use shading to highlight specific elements and give the design a refined, three-dimensional look.

6. Extend the Design to the Fingers:
Extend the mandala to your fingers, using complementary patterns like tiny petals or dots. Ensure the design flows seamlessly from your palm to your fingers for a unified look.
7. Perfect the Mandala:
Review the design and refine any uneven areas. Add final details, like glitter or shimmer, to enhance the festive appeal. This will complete your mandala, making it polished and beautiful.


